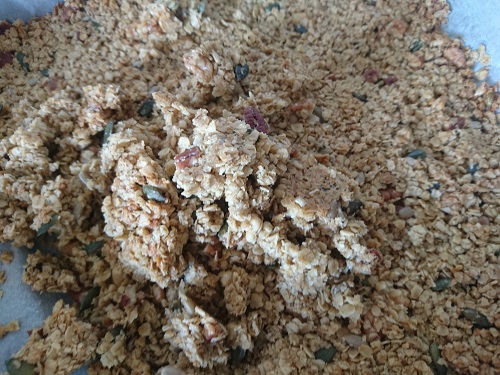
For breakfast, I like varying what I eat. Sometimes when I have enough time I will make my vegan pancakes, if it has quick I just grab a few oat breakfast bars before work. However, my go-to breakfast is this easy homemade granola recipe with …
For breakfast, I usually eat my homemade granola with my oat milk but for those special days when I crave something more special, I always have some English breakfast muffins in my freezer. They defrost quickly and are yummy with so many different toppings depending …
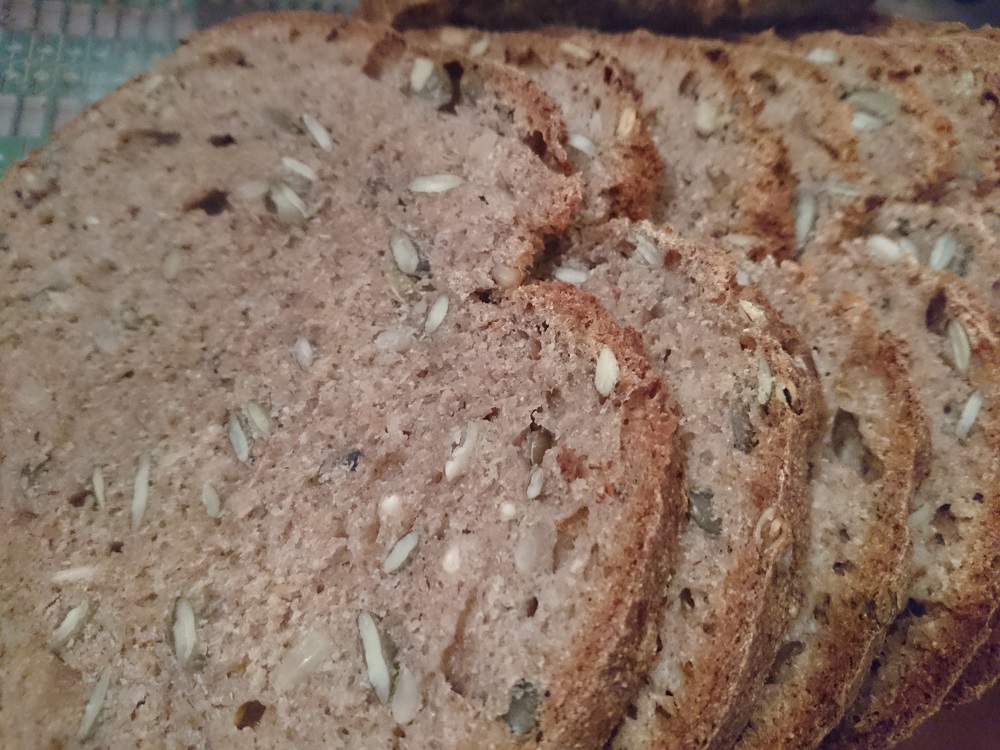
Sourdough bread is hugely popular and if you fancy testing my recipe for German sourdough bread but are missing the starter…look no further! I will share with you here how to make your own sourdough starter with just a few simple ingredients! Well, it is just flour and water so you might be able to start right away!
Although the whole process takes a few days it is well worth it. You will be able to bake your own fresh bread with your own sourdough starter.
Ingredients: 1 cup of rye flour 1/2 cup of water
To feed your starter: 1 cup all-purpose flour 1/2 cup of lukewarm water (if you are in a warm climate cold water is better)
How To Make Your Own Sourdough Starter
Day 1: Combine the rye flour with the cool water in a non-reactive container. For example, you could use glass, crockery, stainless steel, or food-grade plastic. The container should be large enough to hold your starter as it grows; best use a container of at least 1-quart capacity.
Stir everything together thoroughly; make sure there’s no dry flour anywhere. Cover the container loosely and let the mixture sit somewhere at warm room temperature (about 70°F) for 24 hours.
Day 2: You may see no activity at all in the first 24 hours. That is absolutely fine! It may be rowing a tiny bit or even bubbling. That’s great! Either way, discard half the starter (4 ounces, about 1/2 cup), and add to the remainder 1 cup of unbleached all-purpose flour. Also, add 1/2 cup cool water (if your house is warm); or lukewarm water (if it’s cold).
Mix well, cover, and let it rest at room temperature for 24 hours.
Day 3: By the third day, you should see some activity — it should be bubbling and have expanded a bit. Now you can start with two feedings daily spread over the day as your schedule allows. For each feeding, add 4 ounces starter; which is a generous 1/2 cup, once it’s thoroughly stirred down. Discard any remaining starter.
Add a 1 cup (4 ounces) unbleached all-purpose flour, and 1/2 cup water to the 4 ounces starter. Mix the starter, flour, and water, cover, and let the mixture rest at room temperature for approximately 12 hours before repeating.
Day 4: Weigh out 4 ounces (1 cup) starter, and discard any remaining starter. Repeat step #6.
Day 5: Weigh out 4 ounces (1 cup) starter, and again discard any remaining starter. Repeat step #6. By the end of day #5, the starter should have at least doubled in volume. You should see lots of bubbles. Also, the starter should have a bit of a tangy aroma — slightly acidic, but not overpowering. If your starter hasn’t risen much and isn’t showing lots of bubbles, repeat discarding and feeding every 12 hours on day 6, and day 7, if necessary — as long as it takes to create a vigorous (risen, bubbly) starter.
Once the starter is ready, give it one last feeding. Discard all but 4 ounces (a generous 1/2 cup). Feed as usual. Let the starter rest at room temperature for 6 to 8 hours; it should be active, with bubbles breaking the surface.
Remove however much starter you need for your recipe — typically no more than 8 ounces, about 1 cup. If you need more than that either give it a couple of feedings without discarding until you’ve made enough for your recipe plus 4 ounces to keep and feed again.
Transfer the remaining 4 ounces of starter to a jar or some other container. Keep it in your fridge and if you have a screw-on lid put it on loosely rather than airtight.
Have you tried making your own starter? Share your experience in the comments!
You may want to try how to make your own sourdough bread now. Check out my recipe for German sourdough bread. And if you want some advice on how to store your homemade bread have a look here.
If you enjoyed the recipe and want to find more head over to my recipe section and join my Facebook Group which focuses on homemade vegan recipes that are affordable and healthy.
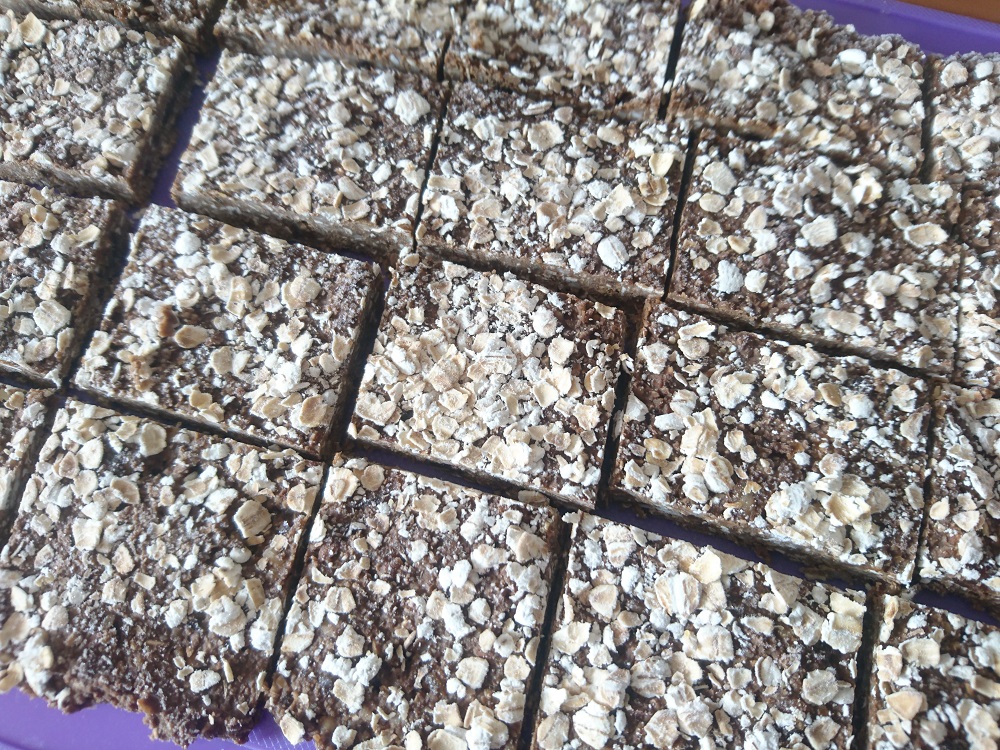
I love making my own oat milk but struggled to find a good use for the leftover oat pulp. There are plenty of good ideas like making cookies or overnight oats but these were not right for me. I love oat bars though and adapted …
Vegan butter is now readily available in most supermarkets. However, I found it difficult to find any option without palm oil with is very important to us. After not finding anything in our local shops I decided to just try making it at home and …
After testing a few different milk alternatives I found that oak milk is perfect for me. It is versatile, I like the taste – even in coffee and it was easier to make at home than I had thought! Everything I needed I already had, so a few months ago I decided to make my own oat milk. Maybe it is time for you to give this a go as well and make your own oat milk at home.
Some people find it can get a bit slimy but personally I have not experienced that. It may happen if you cannot strain the oat milk properly so maybe try a different approach. I use a very fine mesh sieve which works great for me. I found it at my parents’ place and is from my grandparents so I was happy I could give it a new lease of life.
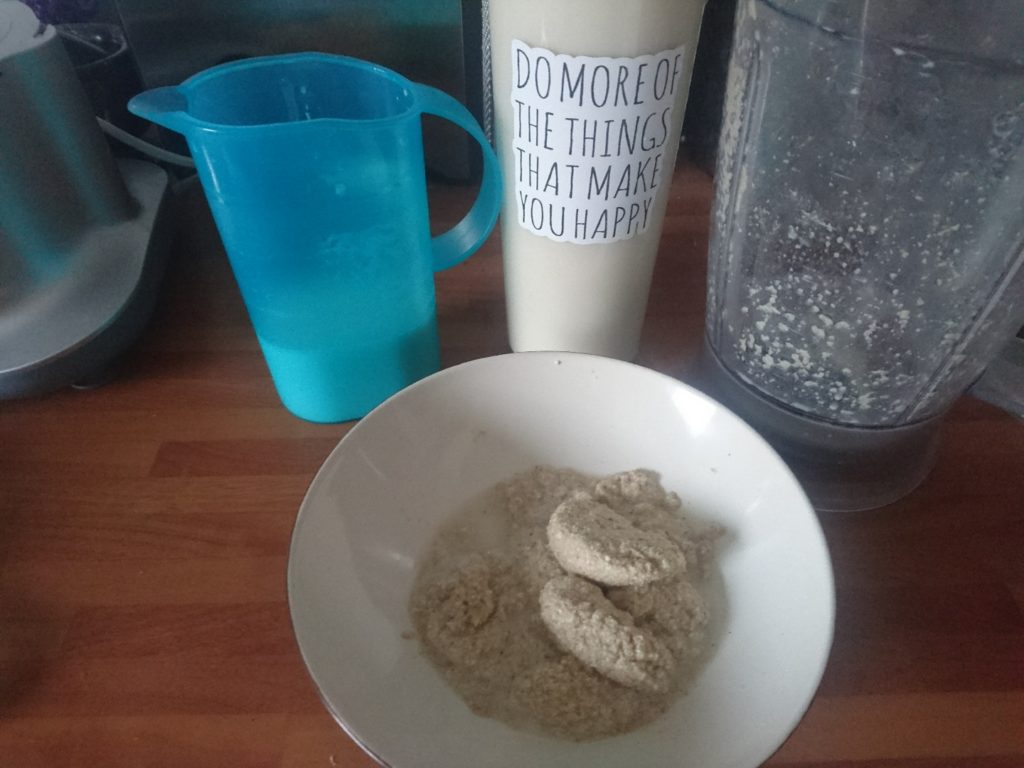
Now check that you have all things that you need to make oat milk. Don’t worry you don’t need a lot. You will need a blender, a sieve, a nut milk bag or simply a clean t-shirt, oats, water and if you wish a sweetener of your choice.
Why Oat Milk?
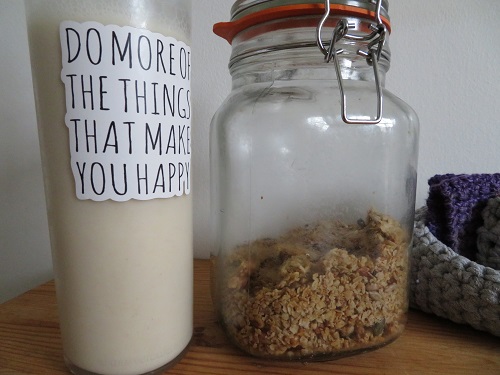
My favourite use is with my homemade granola. I always keep a jar of my granola for my weekday breakfast. It is packed with nuts and absolutely delicious. I really love oat milk for its versatility and it is an eco-conscious choice as it is more environmentally friendly than of course cows milk but also soy or almond milk. So if you are looking for tasty vegan milk that is also better for the environment than other milk, look no further!
Not only is it the eco-concious choice but also a good choice if you want to live a more frugal life. It is very affordable. I just buy a big pack of oats which comes in a cardboard box and it lasts me several weeks. I will not only make oat milk out of it but also use it for granola and in baking. It is great value for money!
I usually make my oat milk at the weekend but really it is such a quick process that I started making it during the week. If I notice that I run out of oat milk I just take 15 minutes in the evening and prepare a new batch.
So now that you have your oats, water and kitchen blender prepared, learn how to make the oat milk.
Learn How To Make Your Own Oat Milk
You will only need these few ingredients and the syrup is optional! I sometimes add syrup if I want sweeted oat milk but usully leave it out as I use my oat milk for a variety of recipes.
1 cup oats (rolled oats are best)
4 cups of water
Optional: Add syrup if you like it a bit sweeter
One cup of oats and four cups of water is all you need
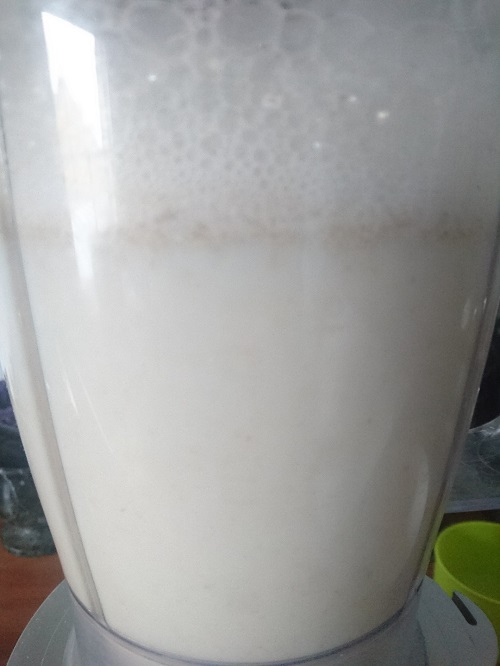
Now that you have all ingredients together add the water and oats to your kitchen blender. Blend on high for about 30 seconds to 45 seconds depending on the power of your blender.
Then grab your strainer, nut milk bag or clean t-shirt to strain the oat milk. I tend to use a fine strainer sieve and found this method to be the best. I also tried it with a coffee press but that was too messy for me and I stuck to the strainer. It takes a little bit longer but really only every takes me a few minutes and the result is worth it!
This was about 30 seconds on high in my blender
Recipe: Make Your Own Oat Milk
Yield: Approx. 1.2 L
Oat Milk
Easy to make vegan milk which is great for baking or in coffee.
Prep Time2 minutes
Additional Time1 minute
Total Time3 minutes
Ingredients
1 cup oats (rolled oats are best)
4 cups of water
Optional: Add syrup if you like it a bit sweeter
Instructions
Add the water and oats to your kitchen blender and blend on high for about 30 – 45 seconds.
Strain and ready! I use a small strainer sieve and it suits me perfectly but you can use a nut milk bag or clean t-shirt or towel.
Now that was really easy, wasn’t it? If you do have questions about the process you can always leave a comment in my blog and I’d love to help.
Oat Pulp Recipe Ideas
If you ask yourself what to make with the remaining oat pulp here is an idea: you could try making raw chocolate oat bars! They are easy to make and are a nice treat or even make a nice breakfast alternative. I also made chocolate brownies with it in the past.
I am very curious how you use the leftover oat pulp though, please feel free to share your recipes in the comments! I love trying new recipes. 🙂
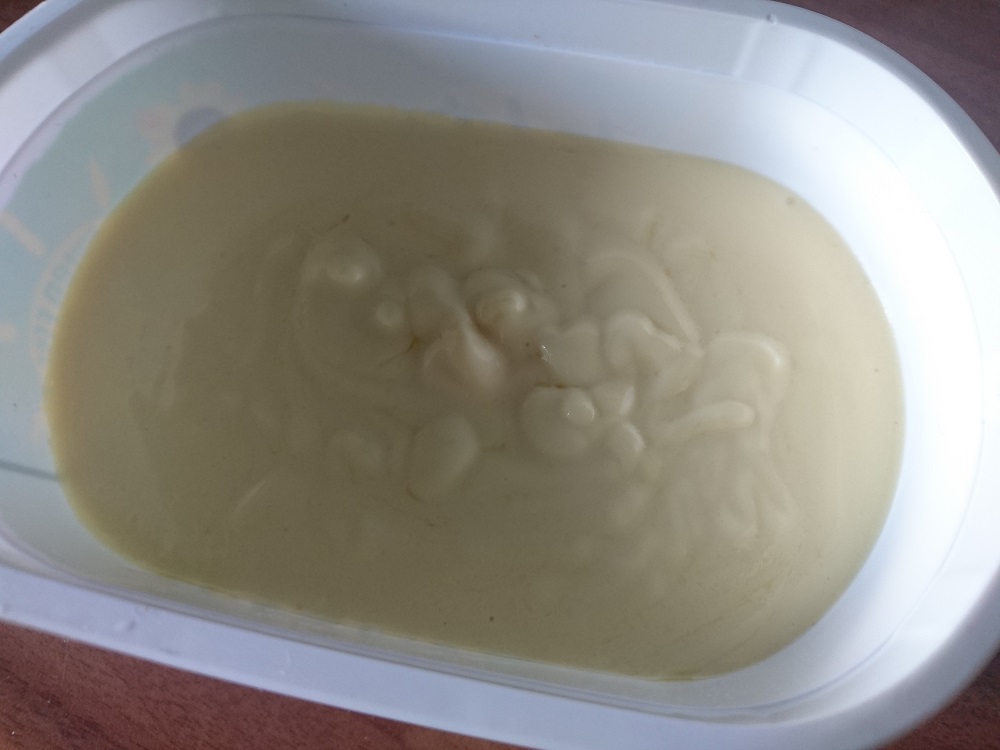
Why Is Oat Milk Separating?
If you made oat milk for the first time you may wonder if it is normal that it is separating. Yes, that is absolutely normal and happens also with store-bought oat milk but you may not have seen it happen yet because of the packaging. This is easy to fix! You just shake it when you take it out of the fridge! This is how mine looks after it sat in the fridge for a while.
Oat milk generally keeps well for about seven days. If you want to learn how to store your oat milk, read about it here.
If you enjoyed the recipe and want to find more head over to my recipe section and join my Facebook Group which focuses on homemade vegan recipes that are affordable and healthy.
Comment below if you have any questions on how to make your own oat milk at home with this recipe. I’m very happy tp help where I can and maybe soon you will make your own oat milk at home regularly. 🙂
This website uses cookies to improve your experience. We'll assume you're ok with this, but you can opt-out if you wish. Cookie settingsACCEPT
Privacy & Cookies Policy
Privacy Overview
This website uses cookies to improve your experience while you navigate through the website. Out of these cookies, the cookies that are categorized as necessary are stored on your browser as they are essential for the working of basic functionalities of the website. We also use third-party cookies that help us analyze and understand how you use this website. These cookies will be stored in your browser only with your consent. You also have the option to opt-out of these cookies. But opting out of some of these cookies may have an effect on your browsing experience.
Necessary cookies are absolutely essential for the website to function properly. This category only includes cookies that ensures basic functionalities and security features of the website. These cookies do not store any personal information.
Any cookies that may not be particularly necessary for the website to function and is used specifically to collect user personal data via analytics, ads, other embedded contents are termed as non-necessary cookies. It is mandatory to procure user consent prior to running these cookies on your website.