The usual breakfast routine for me is granola and oat milk, both homemade. A great option for the busier weekdays. However, for special occasions, we love making this quick vegan palmiers recipe. Traditionally more of a sweet snack for the afternoon, we have discovered it …
One of my rituals every week is baking my own bread with sourdough starter. Now personally I follow the no discard rule as I hate wasting anything and the bread still turns out fine. I’m also a bit lazy and don’t want to feed my …
Whenever I tried vegan cheese so far I was not sold. It is expensive and the consistency and taste never seemed quite right. I decided to make my own soft vegan cheese spread to use with my sourdough bread and as an empanadas filling. This vegan cheese recipe can be used as a simple spread, cheese dip or even a filling. I find it to be quite versatile and as it is quick to make and so affordable it has become a staple in our household.
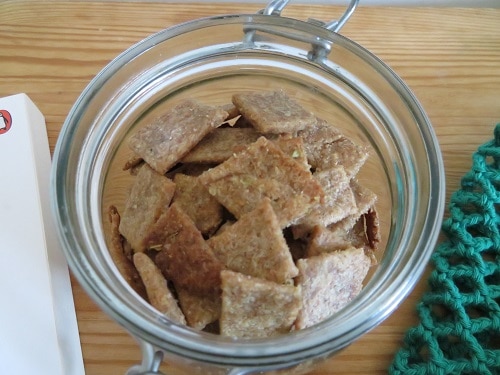
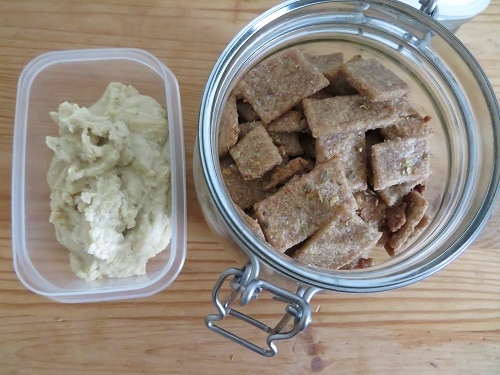
Vegan cheese and sourdough crackers.
The vegan cheese also goes great with my sourdough crackers and makes a great light snack if I feel peckish. So if you like a bread and cheese combination thise may be the right cheese for you.
Most vegan cheese is based on raw cashew nuts to get the consistency right. Cashew nuts are delicious and packed with nutrients. If this is your first vegan cheese recipe, don’t worry, it is also one of the easiest recipes you can try. Maybe you have to buy nutritional yeast but you will soon notice that is one of the staple items in the vegan kitchen – especially if you like cheesy recipes. There are alternatives of course but nutritional yeast will give your recipe that cheesy kick. Most people just sprinkle it over their dishes if they crave cheese but I also like to have a cheese consistency.
To try this recipe all you need is a food processor and a few simple ingredients. Most likely you will have the majority of the ingredients already. All are regular items in the vegan diet and once you made this cheese at home you will realize how much money you will save by simply making this cheese yourself rather than buying the ready-made vegan cheese in the supermarket.
Vegan Cheese Recipe
To make vegan cheese you only need the following ingredients:
1 cup raw cashews (unsoaked)
2 tbsp nutritional yeast
2 tbsp lemon juice
1 clove garlic
1/2 tsp salt
1/4 tsp pepper
1/4 cup water (as needed)
When you have all of your ingredients together and are ready to make your first cheese, place all ingredients except the water in the food processor.
First, pulse the mixture 2 – 3 times to break down the cashews. It should form a coarse, wet mixture. In between pulses, scrape the sides of the food processor with a spatula.
Once you have pulsed the cashews you can now start blending it. While blending, drizzle in the water until the mixture becomes smooth. You may need to stop and scrape the sides of the machine again. This should take about 1-2 minutes. Add more water if required. The consistency is very similar to hummus. So once you have reached that consistency you know that your vegan cheese is ready.
Taste the vegan cheese and add more lemon juice, salt and pepper to taste.
Now if you want to keep the cheese find a suitable airtight container and spoon mixture in it. It will last in the fridge for about a week.
Yield: 10 servings
Vegan Cheese Spread
Easy recipe to make creamy cashew cheese. Great as a spread, dip or as a filling.
Prep Time5 minutes
Total Time5 minutes
Ingredients
1 cup raw cashews (unsoaked)
2 tbsp nutritional yeast
2 tbsp lemon juice
1 garlic clove
1/2 tsp salt
1/4 tsp pepper
1/4 cup water (as needed)
Instructions
Place all ingredients except the water in the food processor.
Pulse the mixture 2 – 3 times to break down the cashews. They should form a coarse, wet mixture. Scrape the sides of the food processor with a spatula.
Now start blending and drizzle in the water until the mixture becomes smooth. If needed stop and scrape the sides of the machine again. This should take about 1-2 minutes. Add more water if needed. The consistency is similar to hummus.
Taste and add more lemon juice, salt and pepper to taste.
Spoon mixture in an airtight container. It will last in the fridge for about a week.
Have you tried this vegan cheese recipe? Share in the comments and let me know how you liked it.
If you know of a good vegan cheese that is suitable to use on pizza please share it in the comments. This is my next experiment and I can’t wait to try the perfect melted vegan cheese on yummy pizza.
If you enjoyed the recipe and want to find more head over to my recipe section and join my Facebook Group which focuses on homemade vegan recipes that are affordable and healthy.
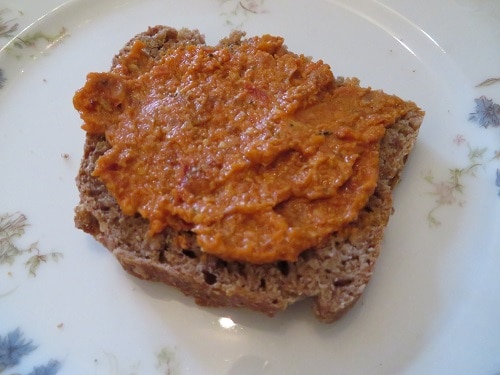
This vegan sundried tomato spread is full of flavour and so quick to make. It will take you less than 10 minutes in total. The ingredients are easy to find and a food processor is all you need. This simple vegan spread recipe will convince …
Chips (or crisps as they say here in Britain) used to be a staple at my house. The pre-packaged kind and not very good for you. A few years ago I looked for alternatives and stumbled upon delicious kale chips. I was not convinced it …
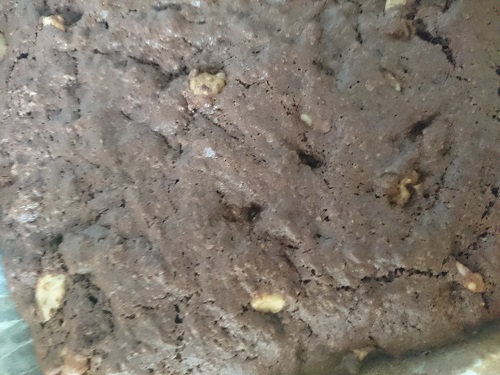
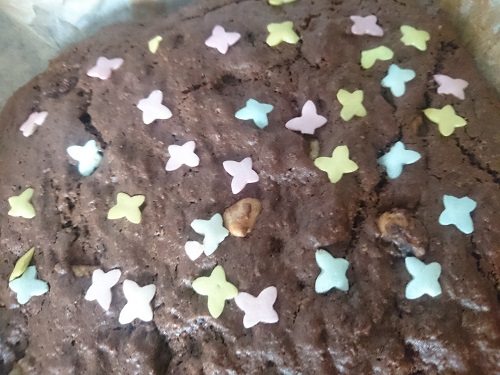
For my birthday, I really wanted to make something with chocolate so I tried this vegan chocolate brownies recipe. It has taken me some time to explore baked treats on my journey to eat more vegan foods. I used to bake all the time and there would always be either cookies or a cake waiting at home but recently not so much. I guess I was a bit intimidated by vegan baking. But there is absolutely no need to. It’s fun trying new recipes or find alternatives for milk and butter in recipes.
It came out so fluffy and slightly crumbly which surprised me. It is not too overpowering as it is not as moist as butter-laden brownie recipes. That was a plus for me personally. I also always keep the sugar low so if you have a sweeter tooth than me you could add more sugar. However, I did add some butterfly sugar drops for decoration as I made it for my birthday.
This vegan chocolate brownies recipe won’t take long to prepare. You might take less than ten minutes mixing the ingredients together. It just needs about 20 minutes in the oven and you have your special treat ready. As it was my birthday I added the little colourful butterflies on top.
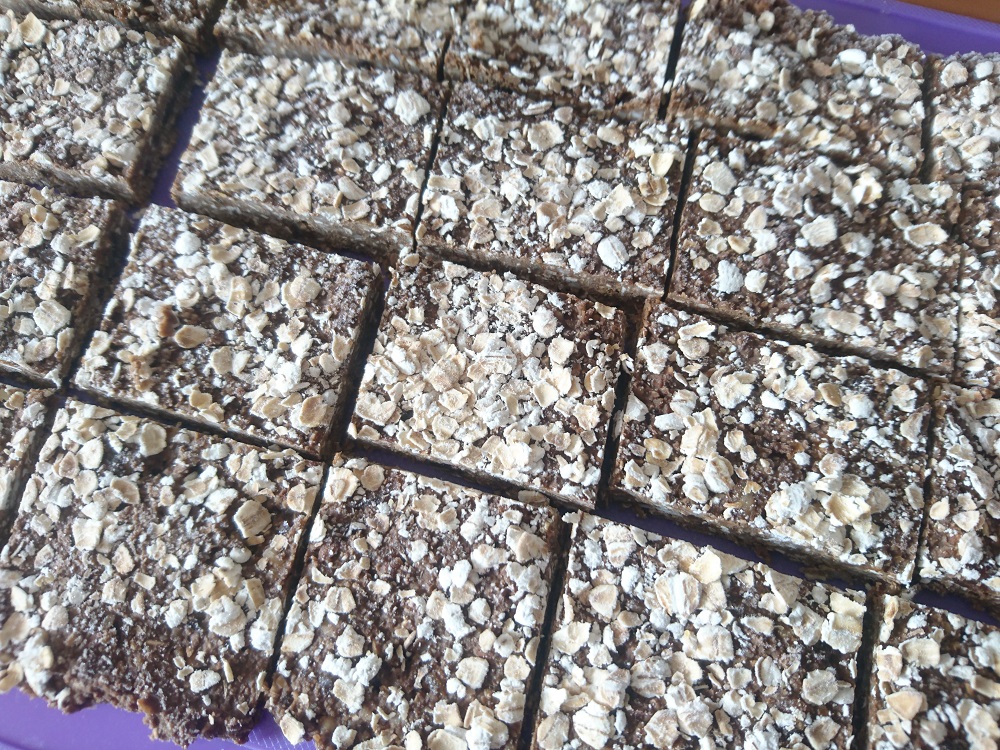
Leftover Oat Pulp
I make my oat milk at home every week and always look for new recipes where I can add the oat pulp. My go-to recipe is these oat bars as they make an excellent breakfast alternative straight from the freezer. But if I fancy something special these chocolate brownies with walnuts for a bit of a crunch are just perfect. Sweet but not too sweet and prepared so quickly I can have oat milk and the brownies ready in under an hour.
Storing your Vegan Chocolate Brownies
If they survive the day in our house I usually freeze treats like this. I like knowing I have some treats in the freezer (along with my sourdough bread) so if I really don’t feel like cooking or preparing something I have an alternative in the freezer. The brownies defrost pretty quickly as well so just take them out if you happen to have some friends dropping by.
Vegan Chocolate Brownies Recipe
Yield: Approx. 12 serving
Vegan Brownie Recipe
Delicious vegan brownie recipe made with leftover oat pulp from making oat milk. Perfect for any Zero Wasters!
Prep Time10 minutes
Cook Time25 minutes
Total Time35 minutes
Ingredients
170 g flour
2 tsp baking powder
1 tsp baking soda
3 heaped tsp cocoa powder
90 g light brown sugar
1 tsp vanilla extract
50 ml olive oil
50 ml oat milk
oat milk pulp (optional)
50 g walnuts (optional)
Instructions
Preheat the oven to 180°C/350°F/gas 4.
Line your baking dish (about 20 cm) with greaseproof paper or grease it.
Add all dry ingredients in your bowl and mix, then add wet ingredients and walnuts and mix until combined.
Pour the mixture into your prepared baking dish and spread it out evenly.
Bake for about 20 minutes.
Leave to cool for about 5 minutes on a cooling rack.
Have you tried this recipe? How did you like it? Leave a comment and maybe even a picture in the comments.
If you enjoyed the recipe and want to find more head over to my recipe section and join my Facebook Group which focuses on homemade vegan recipes that are affordable and healthy.
This vegan empanada dough recipe is so easy to make I am sure it will become one of your go-to recipes in no time. I love how versatile empanadas are and they make a great side or if you are like us also a great …
I love making my own oat milk but struggled to find a good use for the leftover oat pulp. There are plenty of good ideas like making cookies or overnight oats but these were not right for me. I love oat bars though and adapted …
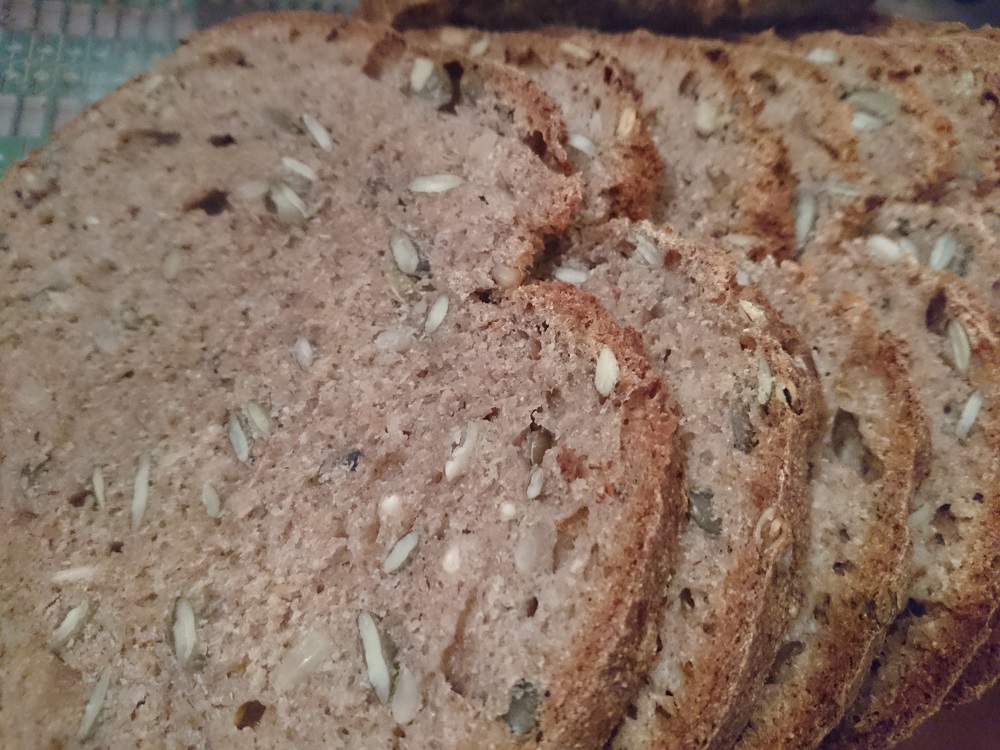
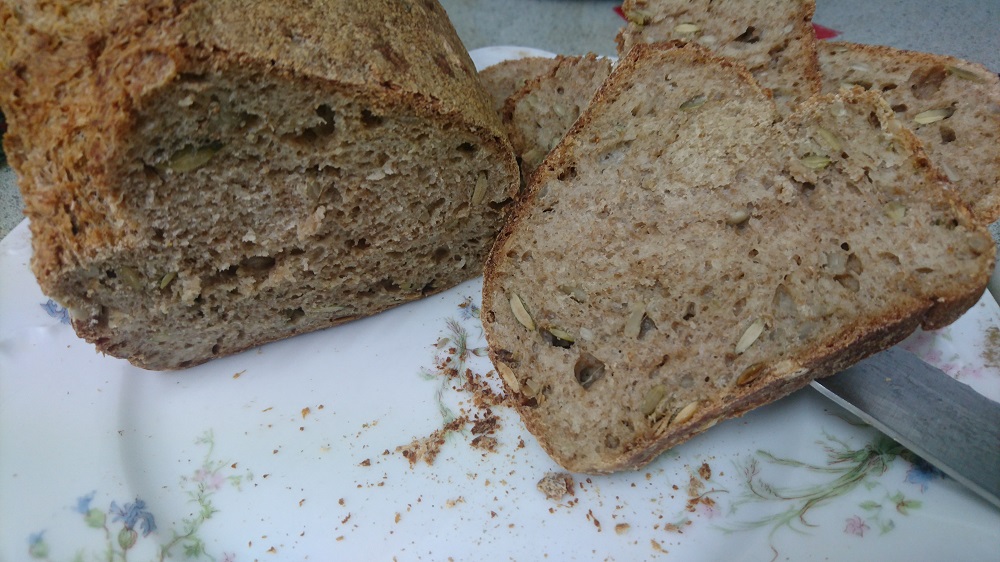
I love knowing what goes in my bread and have been making my own bread for over a year now. Every time the bread turns our great and the crumb is perfect. And a bonus: the flat always smells delicious after baking! Learn how to make this simple sourdough bread recipe your go-to bread recipe!
There are many different bread recipes. For sourdough seemingly all ask you to feed your starter and care for it like a child. I love my recipe because I don’t need to do all of these steps and the bread still turns out amazing. Also, no kneading needed! Of course, if you feel like it, you can always incorporate some kneading time but I found that this recipe does not really need it and this fits my lifestyle perfectly. I want homemade sourdough bread but don’t want to spend hours folding or kneading dough!
This is my foolproof simple sourdough bread recipe. Let me know in the comments how your first attempt turned out!
If you don’t know someone with a starter (I have shared mine with friends) there are starter kits that you can purchase and you can also make your own starter! Learn how to make your own starter here.
In a large bowl, combine the starter with the water and mix well.
Add 500 g (17.6 ounces) of wholemeal flour and mix until combined
Cover the dough with some extra flour so it doesn’t dry out (this is not needed though – my partner keeps on skipping this step and the bread turns out fine every time).
Cover the bowl with a clean towel and let the dough rise overnight or about 8 – 10 hours.
Ingredients for the bread:
500 g (17.6 ounces) flour of your choice (I usually use a 50/50 mixture of wholemeal flour and spelt flour)
250 ml (1 cup) water
16 g (0.5 ounces) salt
Additionally, you may add:
1 teaspoon of German bread spices
seeds of your choice (I use sunflower and pumpkin seeds)
or
olives (cut them in half)
Now before you start on the next step, take out about 150 g (5.2 ounces) of the dough from the day before. This will be the starter for your next bread! Put it in a glass with a lid and put in the fridge until you need it again.
Add the flour, water, salt and additional ingredients you wish to add to your bread to the bowl.
Mix with a wooden spoon until well mixed.
Transfer to your bread tin (I started using a pie dish which I find easier to use) lined with baking paper.
Shape the bread so there are no holes on the side or in the bread.
Use a sharp knife and cut about 3 cm deep at a 45-degree angle.
Let the bread rise for another 4 -6 hours.
Preheat the oven to 230 degrees (450 F).
Bake the bread at 230 degrees (450 F) for 10 minutes.
After 10 minutes turn down to 200 degrees (390 F) and bake the bread for another 50 minutes.
Take the bread out of the oven and remove it from your bread tin. Cover bread with a clean towel so it cools down slowly.
Once the bread has cooled down, it is time to tuck in! Or if you want to use it later I recommend to cut the bread in slices and freeze it until you need it in small batches. You can also store it in bread bins on your counter.
If you have any questions about any of the steps or want to show off your bread leave a comment! 🙂
If you enjoyed this simple sourdough bread recipe and want to find more head over to my recipe section and join my Facebook Group which focuses on homemade vegan recipes that are affordable and healthy.
I’ve seen many questions floating around from where to buy sea moss to how to use it. So I wanted to share some answers in this blog post. I’d also love to hear from you in the comments if you have tried it. But you …
This website uses cookies to improve your experience. We'll assume you're ok with this, but you can opt-out if you wish. Cookie settingsACCEPT
Privacy & Cookies Policy
Privacy Overview
This website uses cookies to improve your experience while you navigate through the website. Out of these cookies, the cookies that are categorized as necessary are stored on your browser as they are essential for the working of basic functionalities of the website. We also use third-party cookies that help us analyze and understand how you use this website. These cookies will be stored in your browser only with your consent. You also have the option to opt-out of these cookies. But opting out of some of these cookies may have an effect on your browsing experience.
Necessary cookies are absolutely essential for the website to function properly. This category only includes cookies that ensures basic functionalities and security features of the website. These cookies do not store any personal information.
Any cookies that may not be particularly necessary for the website to function and is used specifically to collect user personal data via analytics, ads, other embedded contents are termed as non-necessary cookies. It is mandatory to procure user consent prior to running these cookies on your website.